By |2026-02-24T15:35:20-08:00February 23rd, 2026|

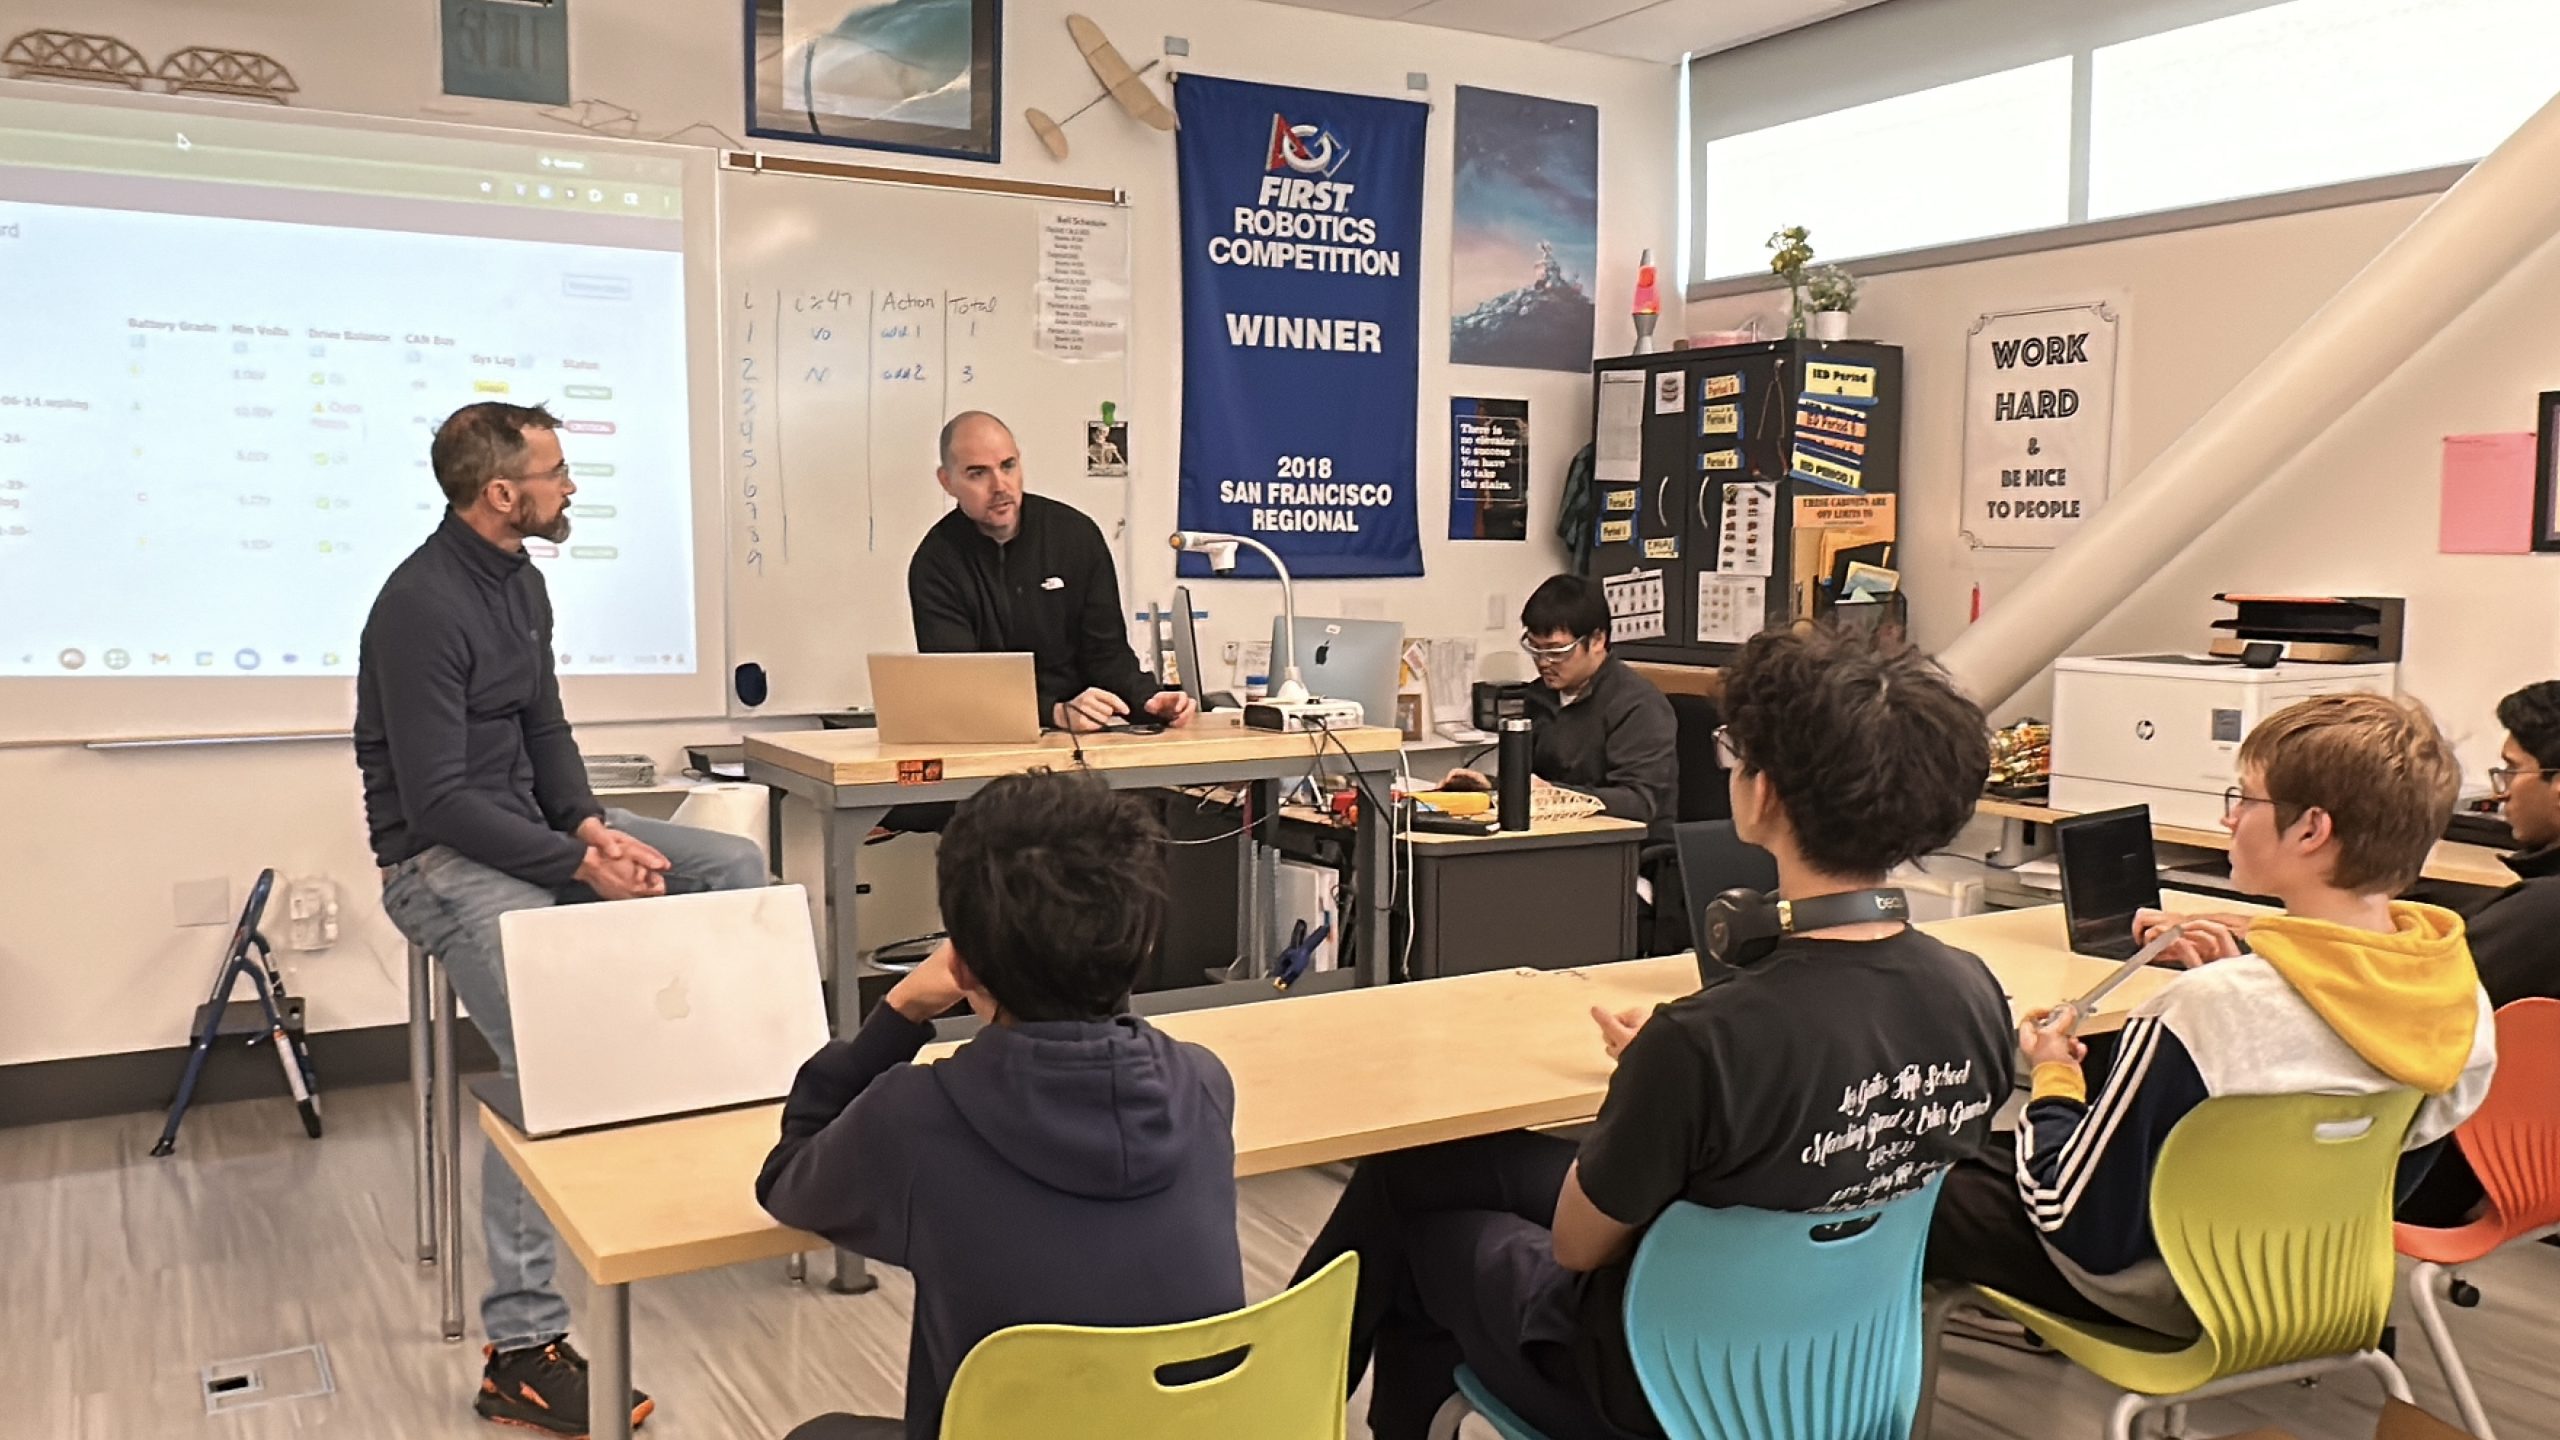
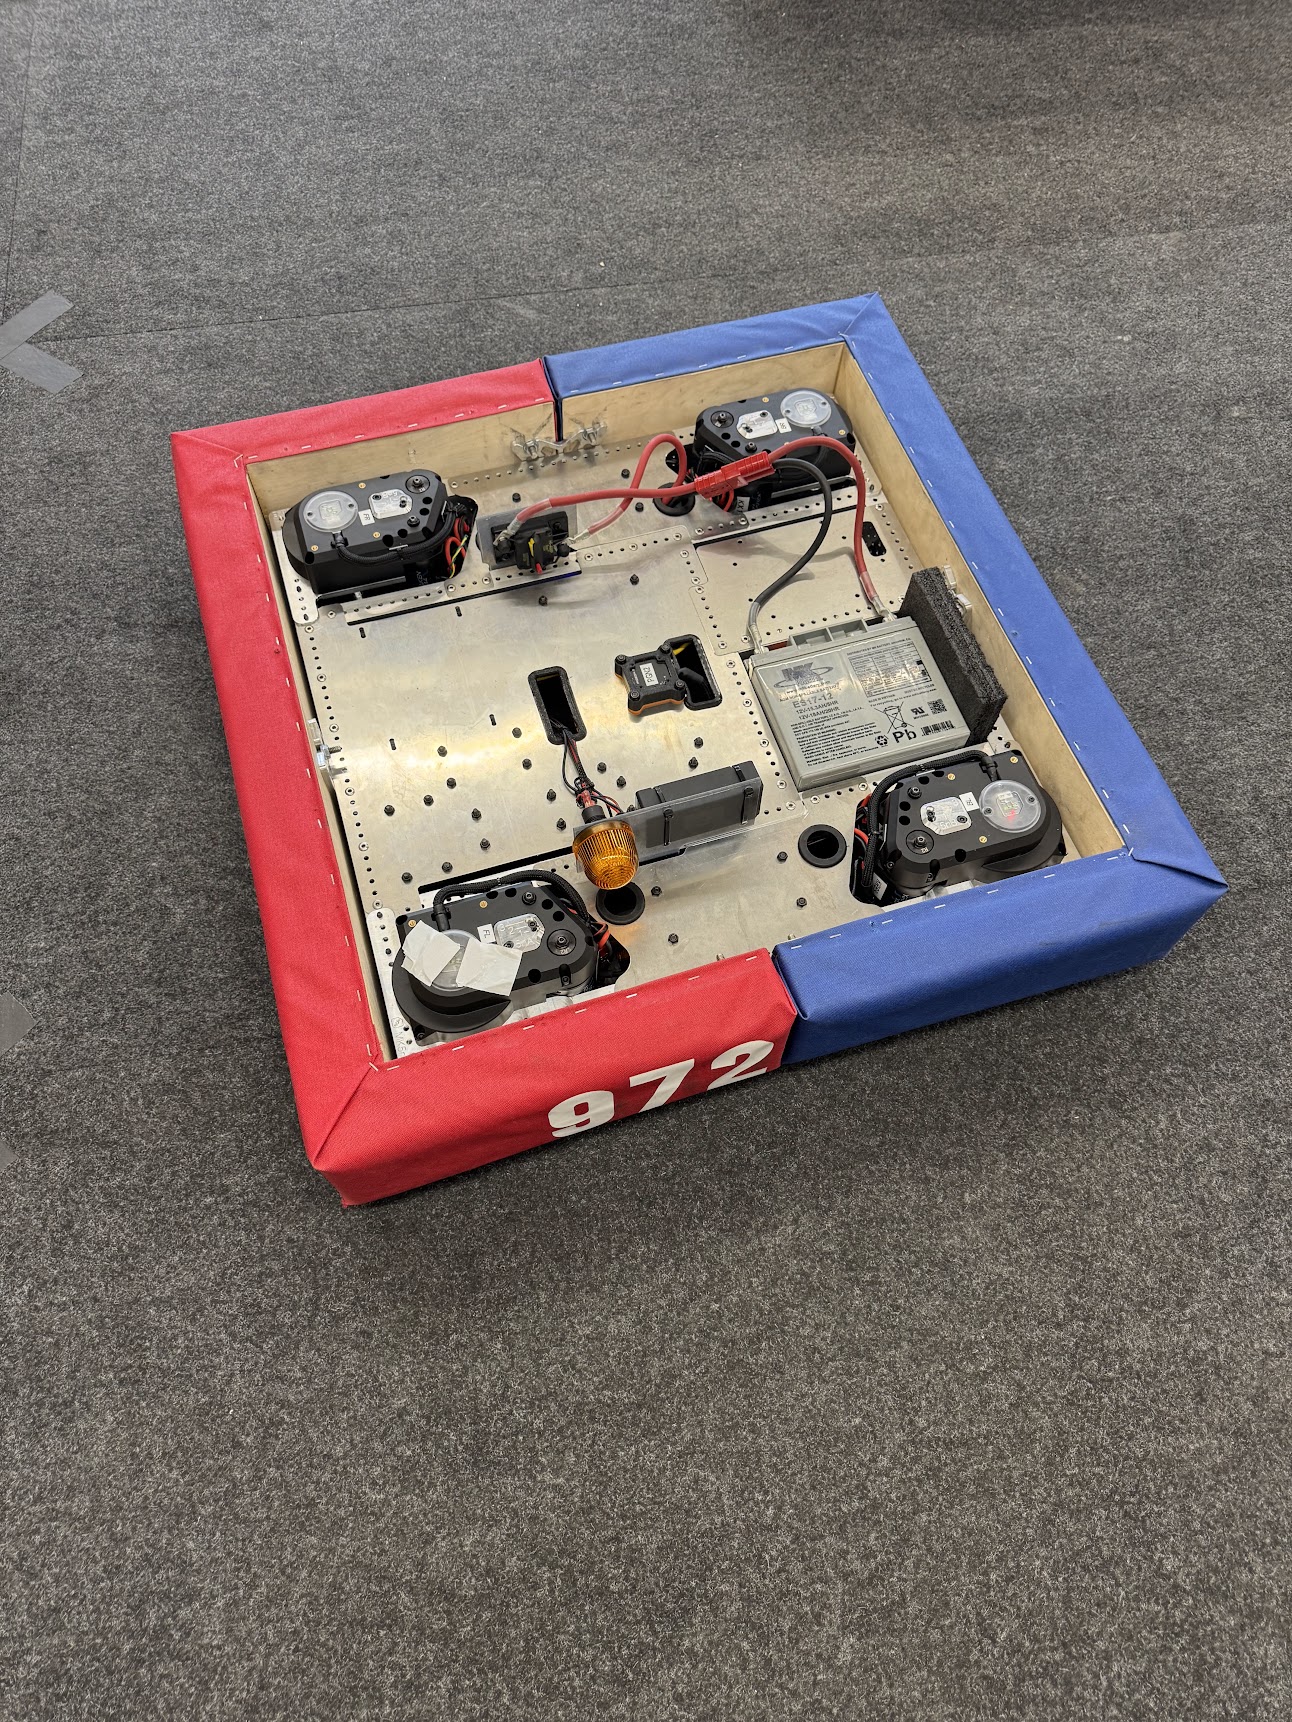
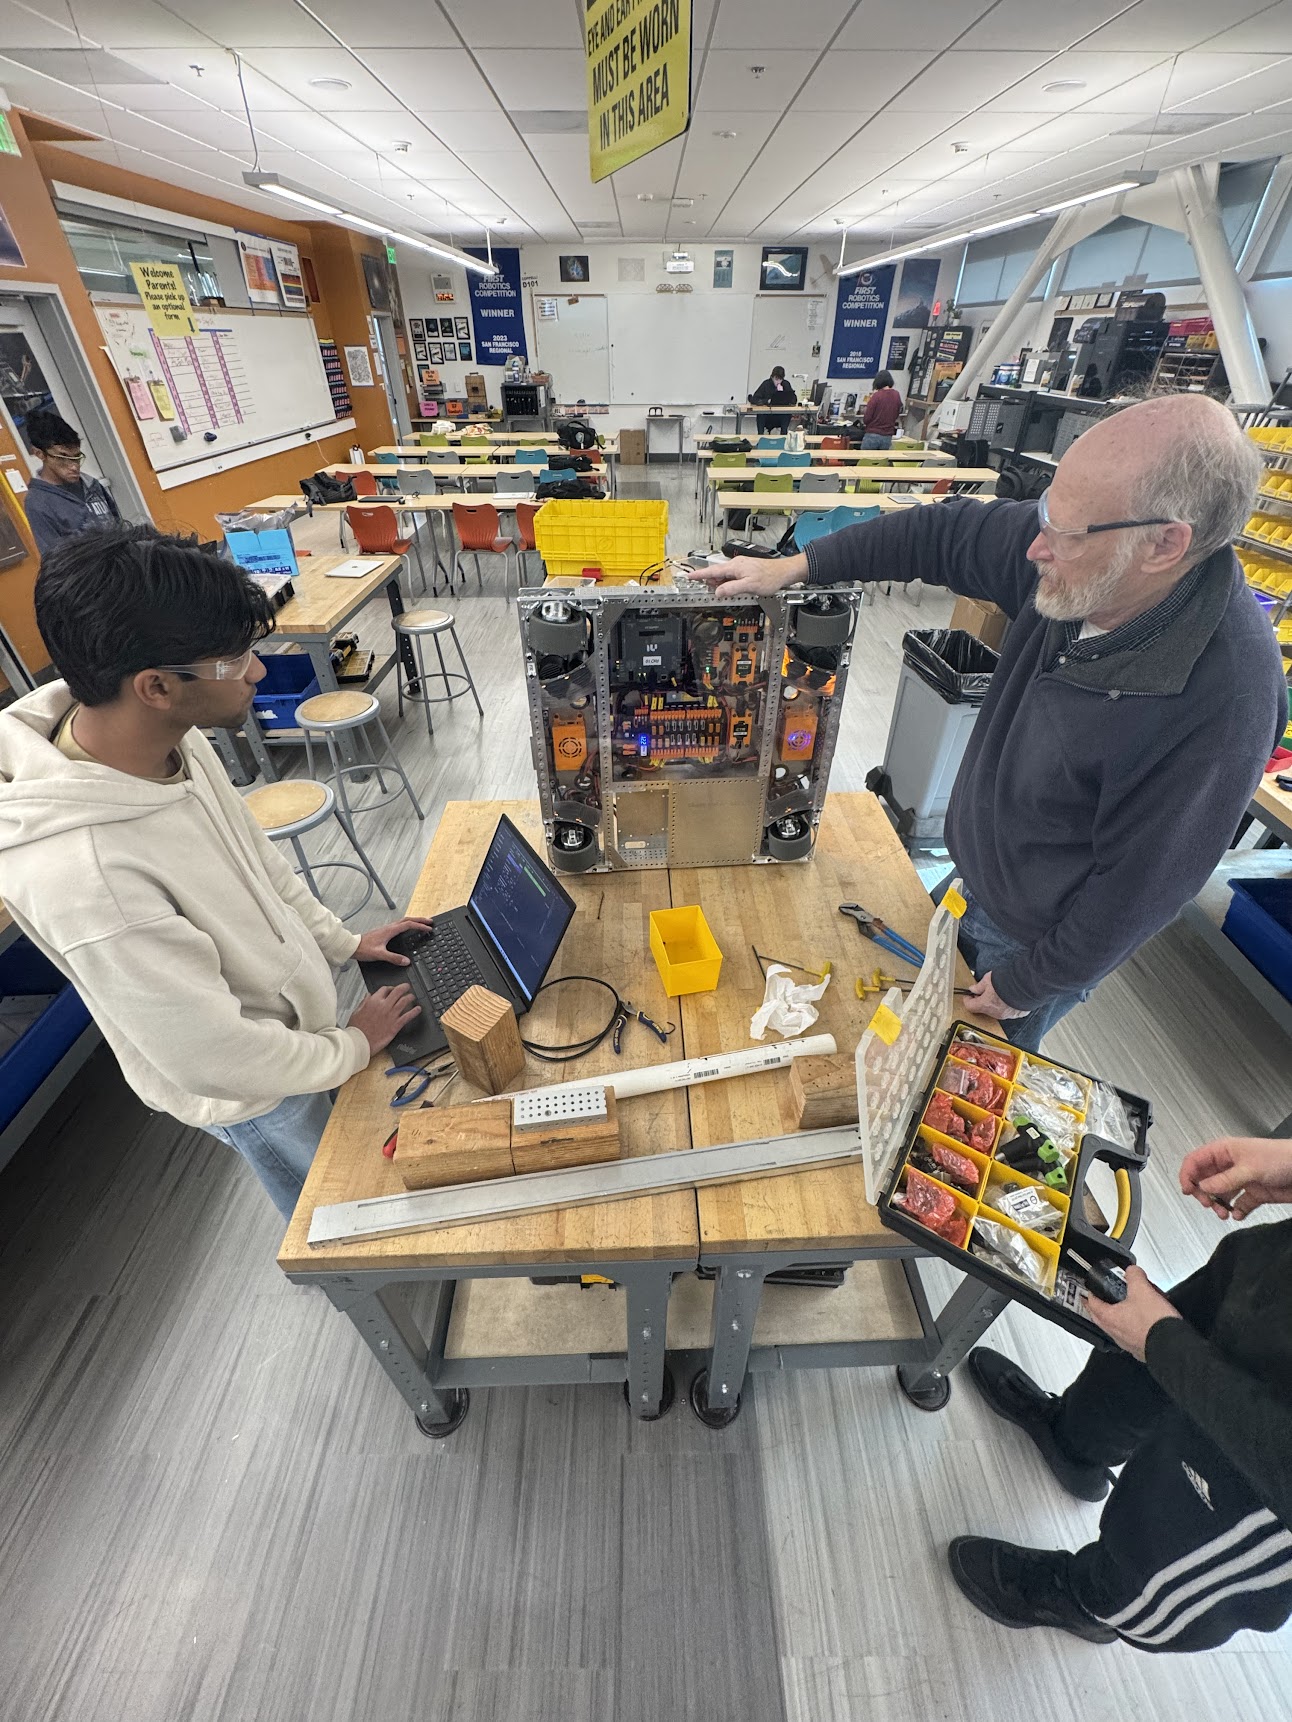
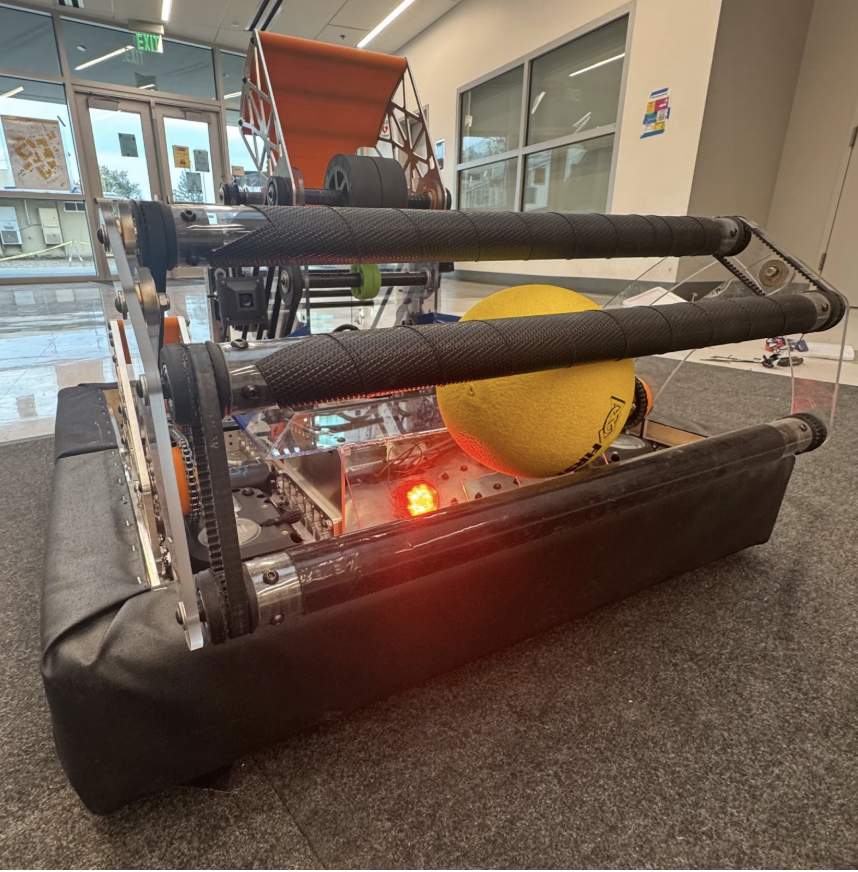
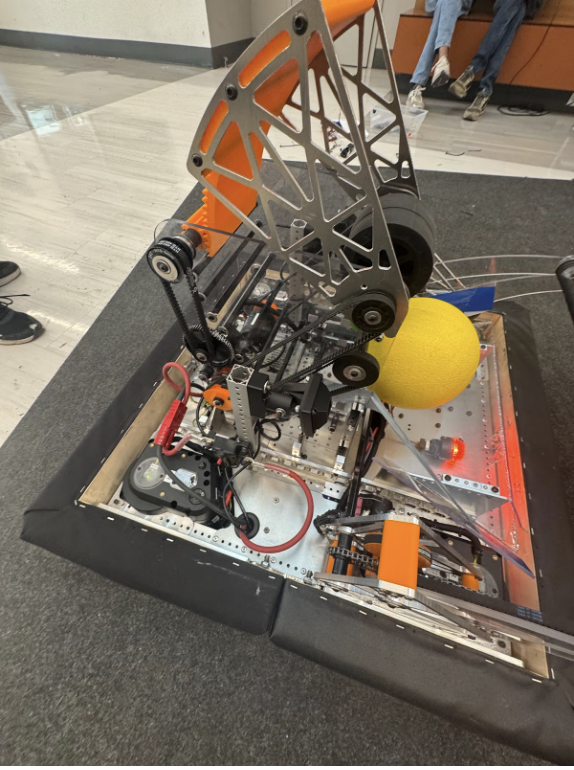
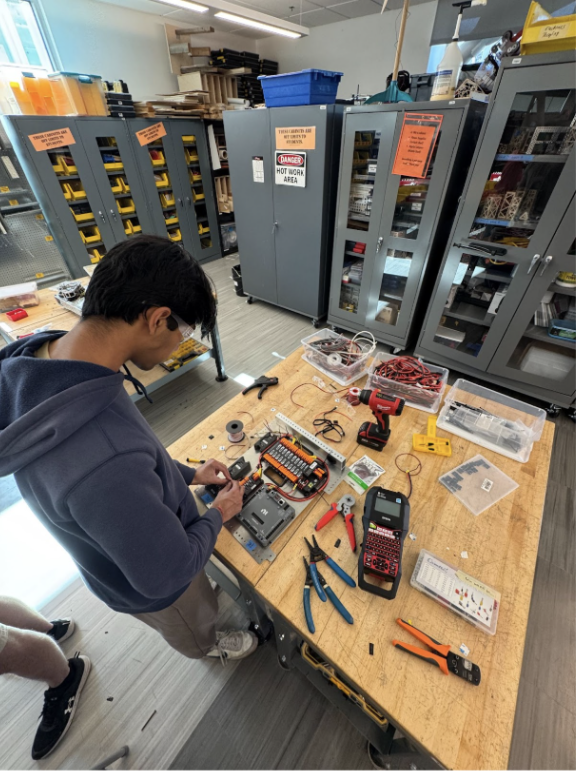
Convergence: Build Week 5 & 6, which spans work days 21 to 30 for our team, is the time of convergence. The drivetrain and Control System Board (CSB) were completed by Work Day 12. The software groups worked on code to validate what would be required for each of their respective subsystems. The various CAD groups turned prototypes into real subsystems, going through many preliminary design reviews (PDRs), iterations, and then final critical design reviews (CDRs). The Spindexer (dye-rotor), floor, and racetrack required some extra time to finalize their designs. During this time, the manufacturing group started to manufacture subsystems that cleared their CDR phase, our 3D printers have been working overtime as well. Subsystems assembly teams have been very busy. Our three robot driver candidates continued to practice with our prior-season robots to become familiar with optimal drive paths within the Alliance and Neutral zones, traversing the bump, and going under the trench. Intake and Store: Assembly work was completed on the intake and store. The Control Systems team completed all the wiring. We moved the robot to the field to validate the end to end operation by running several tests. Our robot driver was able to test acquisition of game pieces running at various speeds while the intake and store hardware [...]

By |2026-02-10T15:32:36-08:00February 10th, 2026|

Prototyping Climb Decision: Telescoping arm - After weight and packaging considerations by the team at large, we made a DVC decision to redistribute the workforce of the windmill climb to the telescoping climb. The windmill design added extra structure and instability, which increased weight and made integration more difficult. The telescoping climb offered a more compact and straightforward solution that fit better with the rest of the robot. Refocusing the workforce allowed the team to improve reliability and spend more time testing and refining the final climb system.   Intake & Store: This week, we have been finalizing the wire management of the intake motor, as well as the mounting for the back wall of the hopper. We decided to use 3M Dual Lock to attach the back wall to the side walls, so it’s easier to access the battery and service other mechanisms above the drivetrain. We also decided to bend the back wall around our climb rather than go around it to make it easier to attach and detach. Spindexer: The CAD and design of the dye rotor were adjusted throughout the week. We were able to make a lot of progress CAD-wise, and we began manufacturing the hex shaft and [...]

By |2026-02-11T16:59:59-08:00February 2nd, 2026|

At the start of build week three, our Decision Voting Committee (DVC) made some important decisions regarding what mechanism had conceptually demonstrated the ability from a hardware and software point of view to support our functional requirements & strategy, and what mechanism would be given an additional week of prototyping time. Our Intake and Store, Spindexer, and Turreted Shooter were approved for our competition robot. Our two climb prototypes were given another week to finalize their prototypes. Intake & Store: Over the past week, our team has been completing the intake CAD. We decided to do a linear intake with an extendable hopper on top of it, so it can store more balls. For this design, we made the hopper extend horizontally while the intaking mechanism extends at an angle, allowing us to have a higher capacity while still fitting under the trench, even when the intake is stowed. We are now finalizing our mounting system, which will allow our manufacturing team to get to work. Spindexer: With the decision to move forward with the spindexer our cadders started working on the CAD for a more complete design based off of our prototype to be integrated with other subsystems. We are taking inspiration from the 111 [...]

By |2026-01-27T10:22:20-08:00January 26th, 2026|

Build Week 2 was a hive of activity with 5 groups focused on prototyping, while a sixth group worked on our Alpha Bot. A final group of students focused on delivering a competition drivetrain (DT) and control system board (CSB) by Work Day 12.  We mounted a turret onto a spare drivetrain with a hoodless shooter. Using two cameras, vision allowed us to calculate the turret’s position in order to score in the hub. We successfully compensated for robot movement by providing shooting on the move (SOTM) and intend to further tune it, then experiment with a real hood. We tested a design for linear climb using three sets of hooks, which let us get an L1 climb, but for L2 and L3, we encountered some issues with the hooks not reaching and the tilt of the robot. Our hooks are spring-loaded, which allows them to go from below the rung. We are pivoting the design to a fast L1 climb, as L3 will likely not be point efficient. We tested our prototype v2 of the windmill climb, and with some human assistance, we got an L1, L2, and almost an L3. We had some issues with the auxiliary arm getting caught on the [...]

By |2026-01-24T11:12:20-08:00January 24th, 2026|

On kickoff day, our team immediately dissected every aspect of the new 2026 FRC game, “Rebuilt.” We constantly reviewed the field layout and put ourselves in the minds of the game designers to reverse-engineer strategy. Our team reviewed the manual for hours, and we broke out into groups to discuss our thoughts on certain rules. Coordinating as a team again, we compiled our thoughts about the manual and then quizzed ourselves to truly master the game. With the game’s dimensions, regulations, and facets in mind, we started to strategize using previous lessons from our mentors’ presentations. We organized our functional requirements into four categories: shall have, expected, could have, and shan't have. Once we finalized our robot’s functional requirements and expectations, we tackled our strategy for the game. This consisted of numerous pitches from our breakout group expressing what they thought was the best strategy for this game. We discussed whether we should utilize the trench by making our robot short, the possibility of stealing the fuel from the opponents, the benefits and downsides to using the human player, and how high we would want to climb the ladder. Once we started our prototyping days, it was clear what we would want to see on a robot. [...]

By |2025-12-21T19:36:01-08:00December 19th, 2025|

This offseason, we decided to build a robot to play a modified version of the 2020 FRC game, Infinite Recharge. We wanted to get more experience building robust linkage intakes and have a chance for the programming team to tune an adjustable-hood ball shooter. The robot’s subsystems (intake and shooter) were primarily designed by first and second-year students, with minimal input and guidance from the upperclassmen, and were designed to be mounted on our new MK5n swerve drivetrain, with a redesigned control system board, and a new “waffle” mounting plate system that was lead by upperclassmen. The goal is to use these “waffle” mounting plates as a standard subsystem interface to improve serviceability no matter the subsystem. You can check out the MK5n Drivetrain blog here.  We’re proud of the work that they were able to accomplish and believe that this training has better prepared the entire team for the upcoming build season and competition season. Partially inspired by 1678’s 2022 and 2020 robots - “Steal from the Best, Invent the Rest”, we de-scoped the game and decided to focus on what would teach us the most while being able to be built in the least amount of time. For example, we decided to only store one [...]

By |2025-12-20T17:58:31-08:00December 19th, 2025|

The project began in mid-September with the basics: laying out the geometry for motors, pulleys, belts, and gears while staying within frame perimeter constraints. Early work focused on plate layouts and making sure there was enough space to mount hardware without interfering with the belt runs. By late September, we finished the hood plate and met my first real challenge: problems with gear meshing. This would become an ongoing theme. In early October, after some research on Citrus Circuits' shooter design, we had made the ambitious move to try and copy their gear by hand. This. did not go well. We learned quickly that precision gear geometry is not something you "eyeball." October brought a major breakthrough in using GearLabs and a Kraken gear profile to make a reliable mesh. The lesson was reinforced in all caps: DO NOT EYE BALL OR HAND MAKE GEARS. Once appropriate gear geometry was in place, we could proceed to complete the 3D printed part studio and further refine the geometry. By mid October, talking to mentors and running calculations through ReCalc showed us that we had drastically underestimated RPM requirements for the shooter design. In other words, it was time for a change—big changes. We revised the 3D printed hood to decrease the minimum angle [...]

By |2025-12-20T18:04:41-08:00December 19th, 2025|

The project began at the beginning of September. We started by deciding which motors we would use and the necessary gear ratios for each mechanism. Once we decided that, we made rough sketches of the gear and motor layouts for the rollers and the pivot mechanism. While designing the intake, the geometry of the intake up and down positions constantly made it challenging for us to design a good mechanism. We had to change parts of the master sketch very often, and it is important to know which parts you should and shouldn’t change. For example, changing the pivot points of the intake or the height of the stowed position would be fine, since the intake would work mostly the same. However, changing the down position might prevent the intake from effectively intaking since its position relative to the ball could be incorrect. Also, changing the horizontal position of the up position might make the robot reach over its frame perimeter. We decided to try stub rollers on this intake. Initially, we decided that the stub rollers would be mounted by putting them against the joint of the polycarb plates. However, we realized that the little surface area of contact between the stub roller and the arm could make the rollers [...]

By |2025-12-20T18:05:30-08:00December 19th, 2025|

With the introduction of the new SDS MK5n swerve modules, we decided to build a 26.5 x 26.5 (our team’s preferred frame perimeter) drivetrain during the fall season. We wanted to make sure there would be no surprises during the build season, and we also wanted the opportunity to work on a new layout of upside-down belly (brain) pan. We spent a lot of time and energy planning out the layout of all our control system components on the brain pan. We worked out how the wires would route inside the brain pan and how to implement strain relief on key connections. We also planned out the CAN bus, and decided to implement two CANivores to isolate the drivetrain devices and the subsystem devices. We will also be using jacketed CAN wire whenever possible, black for drivetrain, grey for all sub systems above the drivetrain, we believe different jacket colors will help with serviceability and troubleshooting. We decided to use Refire quick connect adapters (Anderson and Molex SL connector option) on our Krakens to simplify wiring, improve serviceability and troubleshooting. This also allows us to implement direct runs on the CAN bus, reducing the number of connections, which typically are points of failure. The goal is also to isolate and keep all drivetrain power, [...]

Go to Top